Securing Content in Azure Static Web Apps

Recently, I’ve been working on a few internal projects that required creating and hosting documentation for our team.
However, one challenge consistently got in the way of me being able to quickly share the information: finding an uncomplicated yet secure way to host this valuable content.
Using a static content generator like mkdocs was my preferred approach, but I really wanted to avoid having to run it in a docker container or behind a web server in order to add authentication to the mix.
As it turns out, Azure Static Web Apps paired with MkDocs and Azure AD is a relatively simple solution to this problem. The documentation alludes to the fact you can do all of this, but it took a few hours of stuffing around to get it "just right". Hopefully this can save you the hassle.
Overview
- Create a Static Web App
- Create an Azure AD App
- Add Azure AD configuration to the Static Web App
- Create a Static Web App config file
- Create a deployment pipeline
- Profit!
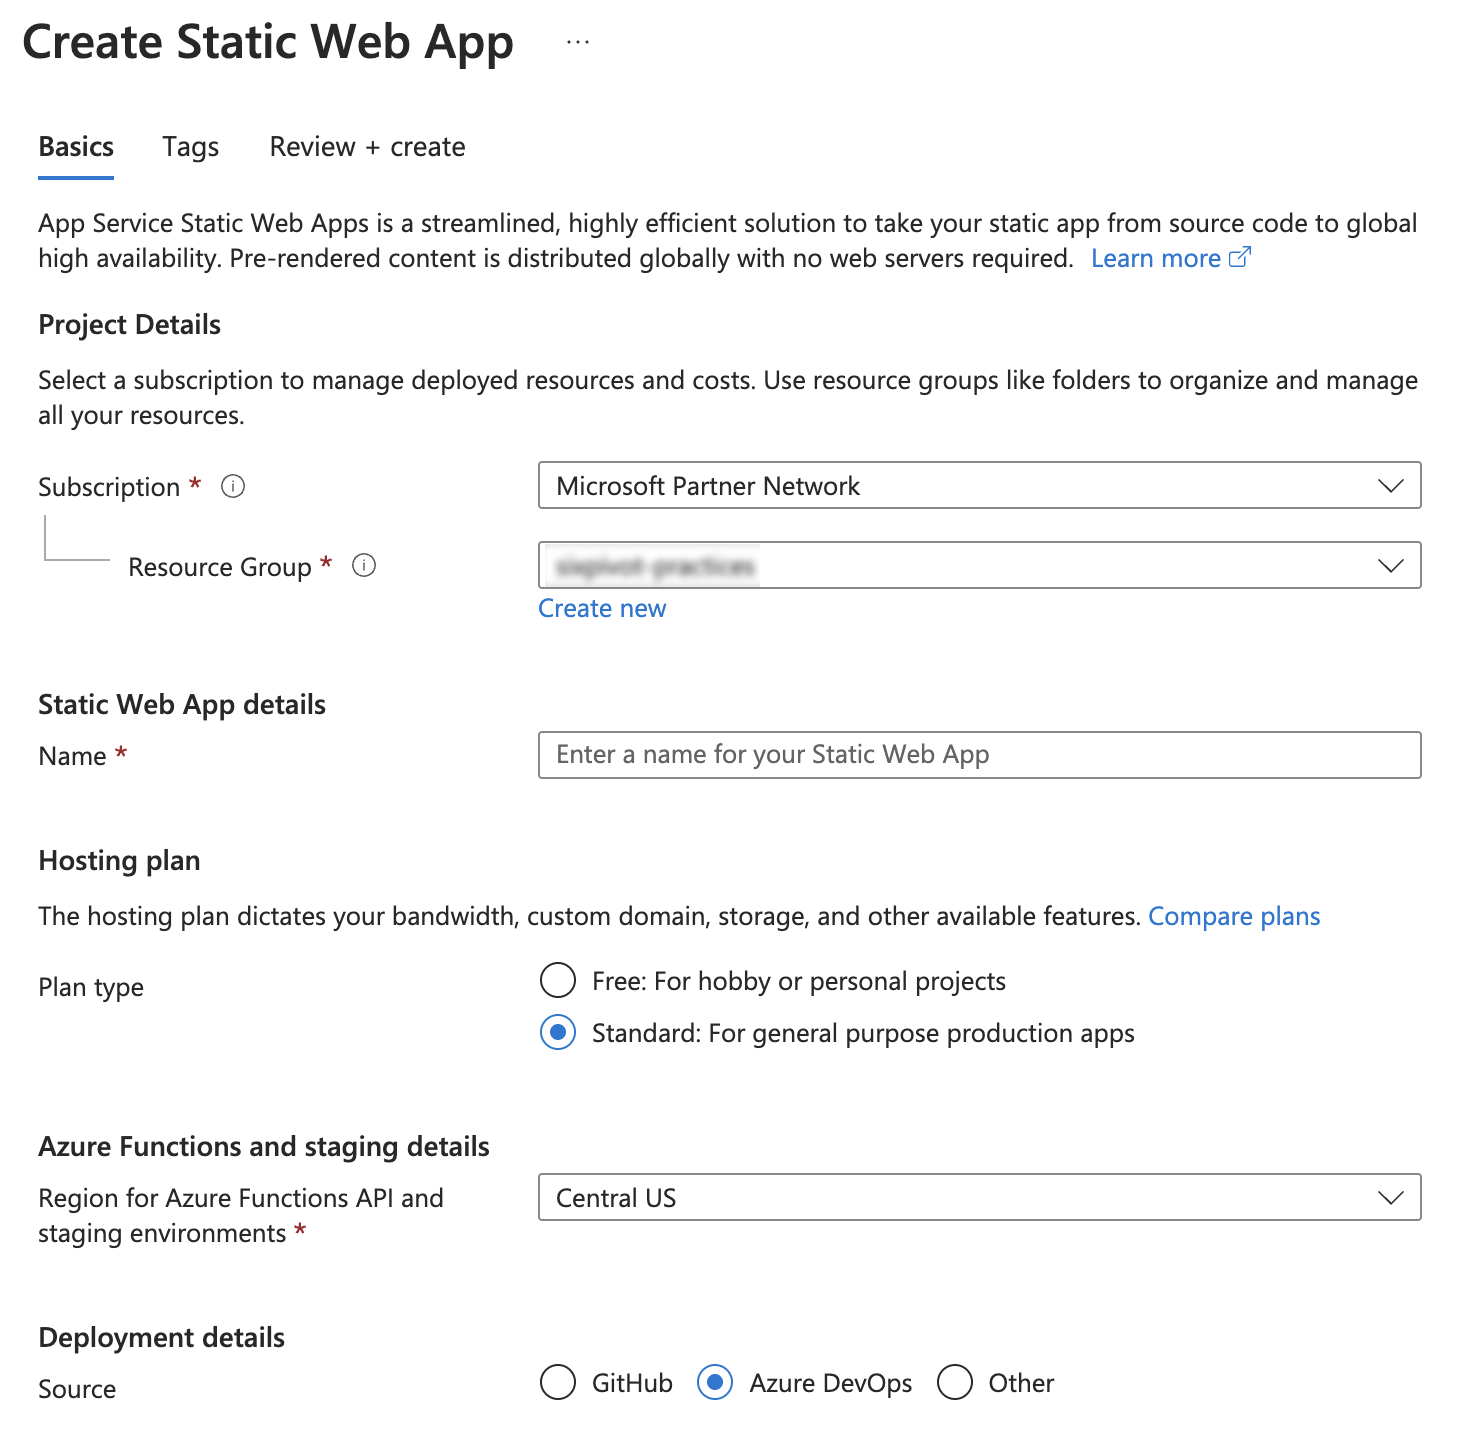
Step 1 - Create Azure Static Web App
Create a new Azure Static Web App, following these configuration options:
- Set the plan type to Standard
Setting it to Standard is important, Free does not allow for custom authentication.
-
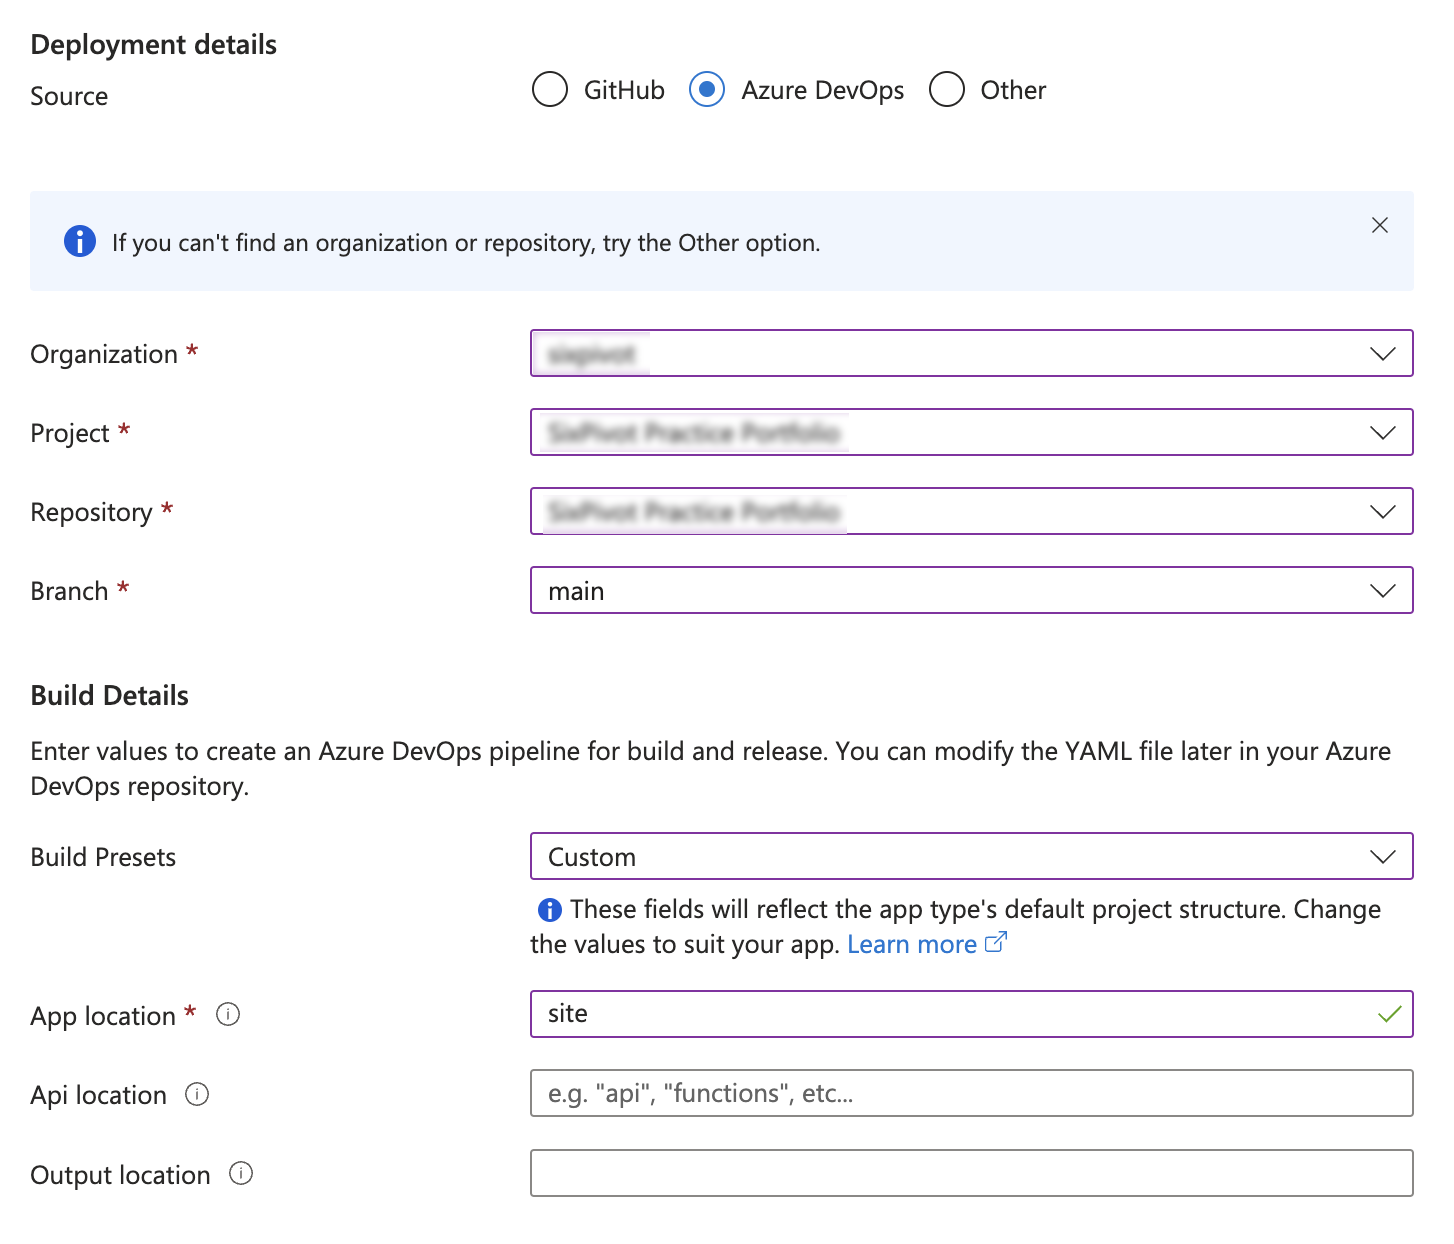
Configure your source Repository, in this case I was using Azure DevOps. I've provided a sample build pipeline later in this post, select Custom as the build preset and the App location to site - this is the output folder for the mkdocs build. Leave the other fields blank.
-
Once the Static Web App is created, go to the main page and Manage deployment token in the top section of the page. Copy this token, you'll need it later to configure your deployment pipeline.

-
Copy the hostname of your deployed Static Web App, it will be of the format
something-cool-abcd12def.4.azurestaticapps.net
Step 2 - Create Azure AD App (Now Entra ID)
To simplify the user signing process I wanted to use Azure AD to allow single sign-on (SSO) capabilities against our existing AD tenant to avoid the need to manage users.
Creating an Azure AD App is required to associate your application with Azure AD, allowing for the secure sign-in and access of users through protocols like OpenID Connect or OAuth 2.0.
The following screenshots show an already configured App, but if you provide the same answers to the creation wizard it will work.
-
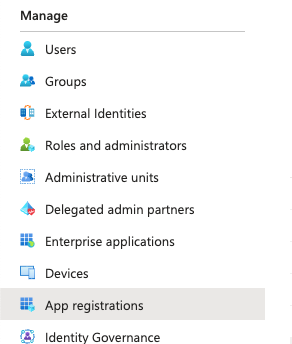
Go to Azure AD (Entra ID), App registrations and create a new Azure AD App. Once created copy the ClientId as you will need it later to configure the deployment process.
-
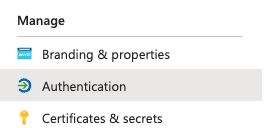
Set Authentication parameters
-
Under the Authentication section, configure the callback URL. Substitute the hostname from the Azure Static Web App steps above and add
/.auth/login/aad/callbackto the end of the URL. If you also configure a custom hostname, you'll need to repeat this step for the custom hostname callback URL.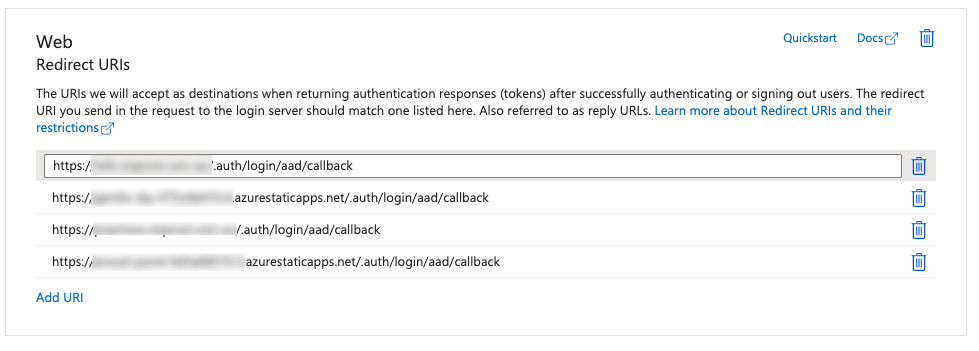
-
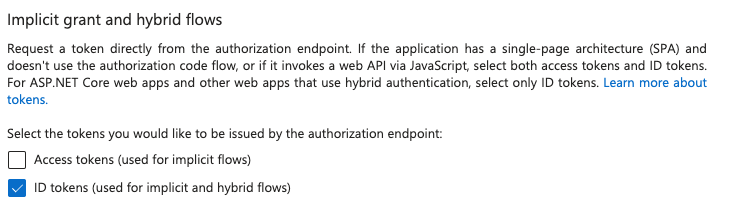
Enable the ID token (hybrid) flow
-
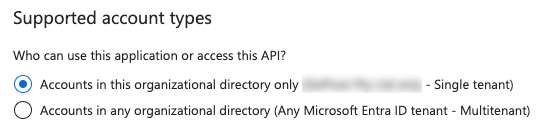
Set the supported account types. If you want to restrict access to your particular AD tenant, ensure to pick the first option "this organizational directory only"
-
Create an app secret and copy this value, as you'll need to configure it in the build pipeline later.

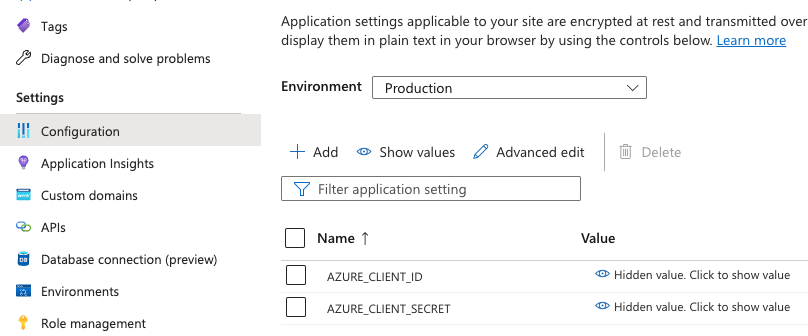
Step 3 - Add Azure AD secrets to Static Web App configuration
The Static Web App requires two secret values to be provided. These are AZURE_CLIENT_ID and AZURE_CLIENT_SECRET both of which come from the Azure AD App configured above.
Step 4 - Add Static Web App configuration to your repo
Azure Static Web Apps support customisation through the use of a staticwebapp.config.json file. The following example is the bare minimum required to offer AD SSO login to a static site.
Important: You need to modify this file to set AZURE_TENANT_ID to the appropriate Azure AD Tenant for authentication. However, AZURE_CLIENT_ID & AZURE_CLIENT_SECRET are simply references to the configuration values created above, don't change these names.
{
  "trailingSlash": "auto",
  "routes": [
    {
      "route": "/login",
      "rewrite": "/.auth/login/aad"
    },
    {
      "route": "/.auth/login/twitter",
      "statusCode": 404
    },
    {
      "route": "/.auth/login/facebook",
      "statusCode": 404
    },
    {
      "route": "/logout",
      "redirect": "/.auth/logout"
    },
    {
      "route": "/*",
      "allowedRoles": ["authenticated"]
    }
  ],
  "responseOverrides": {
    "401": {
      "redirect": "/login",
      "statusCode": 302
    }
  },
  "auth": {
    "identityProviders": {
      "azureActiveDirectory": {
        "registration": {
          "openIdIssuer": "https://login.microsoftonline.com/<AZURE_TENANT_ID>/v2.0",
          "clientIdSettingName": "AZURE_CLIENT_ID",
          "clientSecretSettingName": "AZURE_CLIENT_SECRET"
        }
      }
    }
  }
}
Note: the order of the routes is important, the wildcard route must be after the other ones otherwise it won't work.
Step 4 - Configure Azure DevOps pipeline
The following serves as working example of a build pipeline. I've chosen to use poetry to manage my dependencies and build, however you can produce your mkdocs build using any approach you like.
The key points for this are to make sure that your static build output goes into the site folder and that the staticwebapp.config.json is also copied to the site folder before deploying to Azure Static Web Apps.
You will also need to create a pipeline variable/secret named DEPLOYMENT_TOKEN which contains the value from the Deployment Token step above.
trigger:
- main

pool:
  vmImage: ubuntu-latest

steps:
- task: UsePythonVersion@0
  inputs:
    versionSpec: '3.11'
    addToPath: true

- script: curl -sSL https://install.python-poetry.org | python3 -
  displayName: 'Install Poetry'

- script: poetry install
  displayName: Install Dependencies

- script: poetry run mkdocs build
  displayName: Build mkdocs

- script: cp staticwebapp.config.json site
  displayName: Copy config to build location

- task: AzureStaticWebApp@0
  inputs:
    app_location: 'site'
    skip_app_build: true
    skip_api_build: true
    is_static_export: true
    azure_static_web_apps_api_token: $(DEPLOYMENT_TOKEN)
Summary
The use of Azure Static Web Apps with Azure AD as an authentication provider minimizes hassle, enhances security, and ensures that the focus remains on creating valuable, accessible content for our teams. 🚀